The best breast milk storage bags protect against something that can make a pumping parent’s heart sink: spilled milk.
There is nothing quite like the feeling of discovering a leaky bag in the fridge or a sticky, frozen puddle at the bottom of the freezer. All your hard work, your time, and that precious liquid gold you made for your baby, gone. It’s completely normal to feel a wave of frustration. In the world of pumping, crying over spilled milk is a very real thing.
That’s why choosing the right breast milk storage bag is so much more than a simple purchase. It’s an investment in your peace of mind. A great bag protects every single drop, while a flimsy one can lead to waste, mess, and unnecessary stress.
With so many brands on the Indian market, how do you find the one you can truly trust? We’ve looked past the fancy packaging to figure out what really matters. Here’s our guide to finding the perfect storage bag for you and your baby.
Mistake #1: Using the Wrong Flange Size
Does this sound familiar? You dread your pumping sessions because they hurt. Your nipple is rubbing uncomfortably against the sides of the tunnel, or a large portion of your areola is being pulled in. You might see redness after you pump, and you have a nagging feeling you should be getting more milk for your efforts.
The Easy Fix:
This is, without a doubt, the most common issue I see, and thankfully, it’s one of the easiest to fix! Most pumps come with a standard 24mm flange, but our bodies are anything but standard. Using the wrong size is like trying to run a marathon in shoes that are too big or too small—it’s going to be painful and inefficient.
The goal is for your nipple to move freely in the centre of the flange tunnel without rubbing. So, how do you find your perfect fit? You measure!
- Measure Before Pumping: It’s important to measure your nipple before a pumping or nursing session when it’s not stimulated. Use a ruler or a printable sizing tool to measure the diameter (the distance straight across the base) of your nipple in millimetres. Don’t include your areola.
- Add 2-4 mm: Once you have your measurement, add 2-4 millimetres to find your ideal flange size. For example, if your nipple measures 19mm, you’ll likely have the most success with a 21mm or 23mm flange.
- Check Both Sides: It’s very common to have two different-sized nipples, so be sure to measure both.
Finding the right fit is a game-changer. For a detailed walkthrough with visuals, our complete flange sizing guide will make the process simple and stress-free.
Mistake #2: Setting the Suction Too High
Does this sound familiar? You believe that stronger suction equals more milk, so you crank the dial up as high as you can stand it. You wince with each pull, thinking “no pain, no gain.”
The Easy Fix:
Let’s bust this myth right now: more suction does not equal more milk. In fact, painful suction can do the exact opposite. When your body feels pain, it can inhibit your let-down reflex and reduce milk flow. The goal is to mimic a baby, not a vacuum cleaner!
Here’s how to find your sweet spot:
- Start Low: Always begin your pumping session with the suction on the lowest setting.
- Increase Slowly: Gradually increase the level one notch at a time.
- Stop at “Comfortably Strong”: Keep going until the suction feels strong and effective, but before it crosses into discomfort. This is your “maximum comfortable vacuum.”
Remember, we are looking for efficiency, not an endurance test. Pumping shouldn’t be a painful test of will. If you find that pumping hurts even at a low suction, it’s a sign to investigate other potential causes.
Mistake #3: Skipping the “Let-down” Mode
Does this sound familiar? You turn on your pump and it immediately starts a long, slow, powerful pull. You sit there for several minutes, waiting and waiting for the milk to start, feeling a little impatient.
The Easy Fix:
This is an easy habit to change! When a baby first latches, they use fast, light, fluttery sucks to tell your body it’s time to release milk. Your pump has a special mode to do this exact thing, often called “stimulation” or “massage” mode.
Here is the simple routine for every single pump session:
- Always Start in Stimulation Mode: Begin every session with this fast, light setting.
- Wait for the Flow: Stay in this mode for 1-3 minutes, or until you see your milk begin to spray or flow consistently.
- Switch to Expression Mode: Then, switch to the slower, deeper “expression” mode that efficiently removes the milk.
By starting this way, you work with your body’s natural reflexes, not against them, for a faster let-down and a more efficient session.
Mistake #4: Not Pumping Long Enough
Does this sound familiar? The milk starts spraying, you collect a good amount, and then the flow slows to a drip. You figure that’s it, so you turn off the pump around the 10-minute mark.
The Easy Fix:
Did you know that you can have multiple let-downs in a single pumping session? It’s true! That first gush of milk is just the first wave. Stopping when it slows means you’re missing out on the milk waiting behind it. Over time, not fully draining the breast can signal your body to produce less.
To ensure you are fully emptying the breast, follow this simple rule:
- Aim for 15-20 Minutes: Plan to pump for a full 15-20 minutes, even if the milk flow has slowed or stopped.
- Pump Through the Pause: When the flow slows, keep the pump running. Often, after another few minutes, you’ll trigger a second let-down. Using gentle breast compressions can help!
- Switch It Up: You can even switch back to the stimulation mode for a minute or two to encourage that next let-down.
Pumping for a few extra minutes is one of the best things you can do to maximize your output. It’s a key strategy if you’re looking for ways to increase your milk supply.
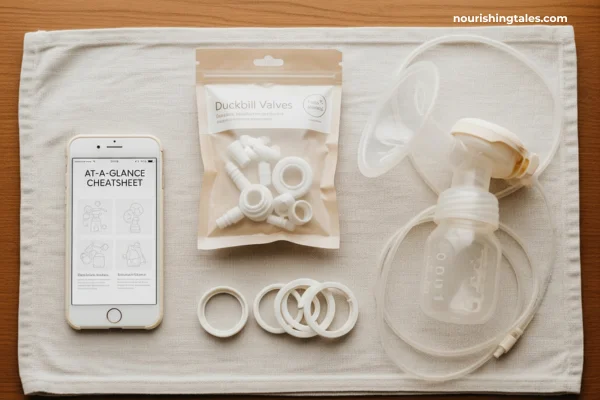
Mistake #5: Pumping with Worn-Out Parts
Does this sound familiar? Your trusty pump just doesn’t seem to be working as well as it used to. The suction feels weaker, and your milk output has dipped. You’re starting to think your pump is broken.
The Easy Fix:
Before you worry about the pump motor, check the small parts! Pump parts are not meant to last forever. Over time, the small silicone pieces like duckbill valves or membranes stretch and wear out, causing a loss of suction.
Here’s your action plan:
- Create a Replacement Schedule: You can’t always see the wear and tear, so it’s best to replace parts proactively based on the manufacturer’s guidelines.
- Keep Spares on Hand: Order an extra set of parts so you’re never caught off guard.
- Inspect Often: When washing your parts, give them a quick look. If a duckbill valve isn’t sealed shut at the tip, it’s time for a new one.
Regularly replacing these inexpensive parts can instantly restore lost suction. To take the guesswork out of it, check our helpful chart on when to replace your pump parts.
You’ve Got This, Mama
Pumping is a journey of love, and it’s okay for the road to have some bumps. Please don’t let these common issues discourage you. They are not reflections of you or your ability to provide for your baby—they are simply technical glitches that can be easily solved.
By making these small adjustments, you can make your pumping experience so much more comfortable and positive. Be patient and gentle with yourself. You are learning, you are adapting, and you are doing an amazing job
Medical Disclaimer:The information provided in this article is for educational purposes only and is not a substitute for professional medical advice, diagnosis, or treatment. Always seek the advice of your physician or another qualified health provider, such as an International Board Certified Lactation Consultant (IBCLC), with any questions you may have regarding a medical condition or your breastfeeding journey.