You’ve Got This: A Gentle, Step-by-Step Guide to Your First Pumping Session
If you’re staring at your brand-new breast pump right now, feeling a mixture of determination and nervousness, I want you to take a deep breath. I’ve been exactly where you are—three times, actually. And I promise you, this moment that feels so overwhelming right now? It’s going to become second nature before you know it.
Your first pumping session isn’t about filling bottles or hitting numbers. It’s about taking one small, brave step into a new skill that will serve you and your baby beautifully. Let’s walk through this together, slowly and gently, with zero pressure and lots of reassurance.
Why Your First Session Is Different (And That’s Okay)
Before we dive into the how-to, I need you to understand something crucial that I wish someone had told me: your first pumping session is about learning, not producing.
After months of reading research from lactation experts and trusted sources like KellyMom, I learned that the amount you express during your very first session has absolutely nothing to do with your future milk supply. In fact, most moms pump between just a few drops to maybe half an ounce total during their first attempts. If you’re in the early postpartum days expressing colostrum, you might see anywhere from 0.1 to 11.2 mL in the first 24 hours—and that tiny amount is liquid gold.
The real goal today? Sending your body the signal that milk is needed. That’s it. You’re placing an “order” with your body, and it will respond beautifully over the coming days and weeks.
Part 1: Setting Yourself Up for a Calm, Comfortable Session
Let’s create a little sanctuary for you—even if it’s just for 20 minutes. These few simple steps will make your entire experience more pleasant and effective.
1. Do a Two-Minute Equipment Check
I know instruction manuals are boring (trust me, I’ve skimmed through plenty), but take just two minutes to glance at the diagram showing your pump’s main parts. You don’t need to memorize anything—just a quick “hello, nice to meet you” with the flanges, valves, and bottles. Knowing where things go will save you frustration when your hands are full.
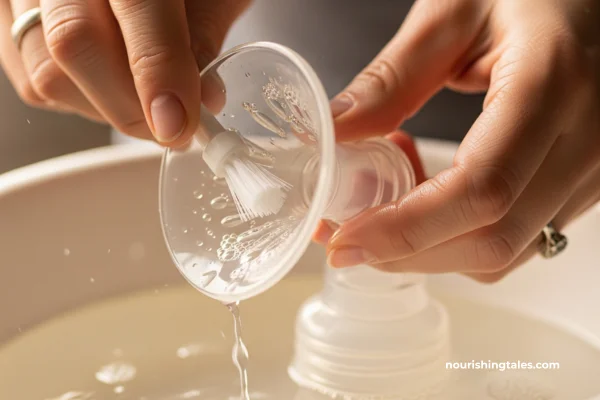
2. Wash and Sterilize Your Parts (Just This Once)
For your very first session, all the parts that will touch your breast or milk need to be washed and sterilized. This is crucial for your baby’s safety, especially in the early weeks. The American Academy of Pediatrics and CDC recommend sterilizing by either boiling parts for 5 minutes, using a microwave steam bag, or running them through a dishwasher with a sanitize setting.
After this first session, you’ll only need to wash thoroughly with warm soapy water after each use, and sterilize once daily (especially if your baby is under 2 months old). If you need a detailed refresher on cleaning, we have a complete guide on how to clean your pump parts
.
3. Find Your Cozy Corner
Where will you pump? This matters more than you might think. Find a comfortable chair where you can sit upright with good back support—imagine how you’d sit at a desk, with your back straight and shoulders relaxed. Poor posture can actually interfere with your let-down reflex and leave you with an aching back.
If you’re recovering from a C-section, you can recline slightly (with pillows supporting your back), but avoid leaning too far back or milk might flow backward instead of into the bottles.
Grab these essentials:
- A big glass of water (hydration helps milk flow)
- A healthy snack (your body needs fuel for this work)
- Your phone with photos or videos of your baby (this is a secret weapon for triggering oxytocin)
- A small pillow or cushion for back support
4. Wash Your Hands
This simple 20-second handwash with soap and warm water protects your baby from germs. It’s non-negotiable, but it’s quick.
5. Take One Grounding Breath
Close your eyes. Place one hand on your heart. Take a slow, deep breath in through your nose for a count of four, and release it through your mouth for a count of six. Feel your shoulders drop away from your ears.
Here’s what I learned from lactation experts: stress and tension can actually block the release of oxytocin, the hormone you need for milk to flow. Your emotional state matters. So let go of any worry about “doing it right” or “getting enough.” You’re simply learning something new, and you’re already doing an amazing job by being here.
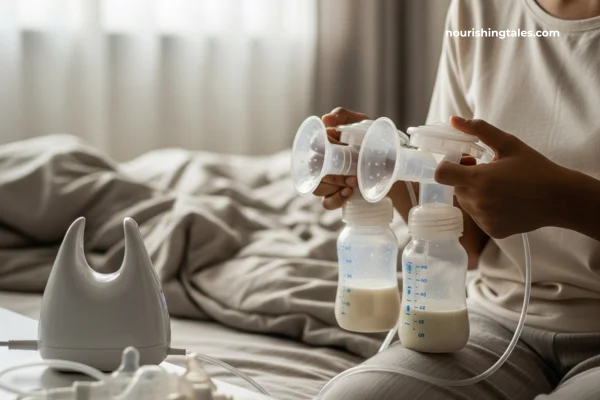
Part 2: Let’s Begin Pumping—One Gentle Step at a Time
You’re ready. We’re going to go slow, and I’ll explain exactly what to expect at each stage.
Step 1: Get Comfortable and Trigger Your Let-Down
Before you even turn the pump on, spend 1-2 minutes gently massaging your breasts. Using your fingertips, make small circular motions all around each breast, working from the outside toward your nipple. This skin-to-skin contact signals your brain to release oxytocin, which pushes milk toward your nipples.

Some moms also find it helpful to apply warmth—a warm shower, a heating pad, or a warm compress for a minute or two before pumping can encourage milk flow.
Now, here’s the trick that was a total game-changer for me: look at your baby. Pull up photos or videos on your phone. If your baby isn’t with you, smell something they’ve worn recently. Studies show that visual and sensory cues related to your baby can significantly boost milk flow by triggering that crucial oxytocin release. This isn’t just emotional—it’s physiological. Your body responds to your baby, even when they’re not in the room.
Step 2: Center the Flange Correctly
Place the flange (the cone-shaped part) over your breast so that your nipple is perfectly centered in the tunnel. Your nipple should move freely in and out without rubbing against the sides, and very little (ideally no) areola should be pulled into the tunnel when the pump is on.

If it feels pinchy or uncomfortable, gently break the seal with your finger and reposition. Here’s something that surprised me during my research: if you feel pinching, your flange is probably too big, not too small. I know that sounds backwards, but when a flange is slightly too large, it pulls in a bit of your areola, which gets pinched and trapped.
Getting the right fit is absolutely crucial for comfort and effectiveness. If you’re unsure about your size, check out our flange sizing guide it can make all the difference.
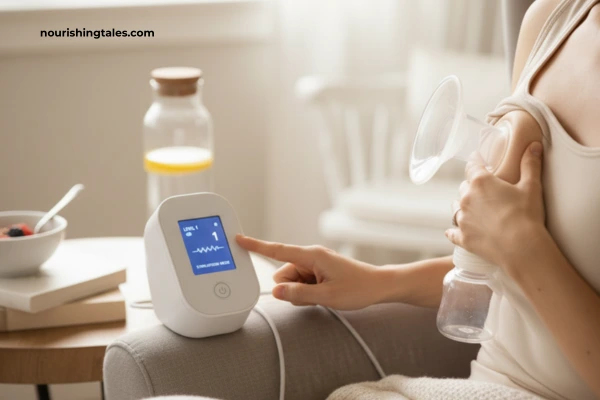
Step 3: Start on the Lowest Setting
Turn your pump on and make absolutely sure it’s on the lowest setting. This is so important. Many new moms assume that higher suction equals more milk, but that’s actually not true—and it can cause pain, which will work against you.
Pumping at the highest suction you can comfortably tolerate is ideal, but comfortable is the key word. If it hurts, turn it down immediately.
Step 4: Use “Stimulation Mode” First
Most electric pumps start in what’s called “Stimulation,” “Massage,” or “Let-Down” mode. You’ll notice the pump doing quick, fluttery, light sucks—usually about 120 cycles per minute. This mimics how your baby initially sucks to stimulate your milk to flow.
Let the pump stay in this mode for about 1-2 minutes, or until you see milk beginning to drip or spray. Some moms see let-down within 30 seconds; others take 3-5 minutes. Both are completely normal. Don’t watch the clock—watch for the milk.
Step 5: Switch to “Expression Mode”
Once you see milk flowing more steadily (even if it’s just a few drops becoming a small stream), press the button to switch to “Expression” mode. The pattern will change to slower, deeper, more rhythmic pulls—this mimics how your baby sucks once milk is flowing, and it’s designed to efficiently remove milk.
Some pumps automatically switch after about 2 minutes; others require you to manually press a button. If your pump doesn’t switch automatically and you forget, don’t stress—but manually switching when you see milk flow can help you collect more.
Step 6: Gradually Find Your Comfort Zone
Now you can slowly increase the suction level, one notch at a time. Stop when you feel a strong but comfortable pull. It should feel like a firm tug, not painful.
Many experienced pumping moms told me they keep their suction on medium, not maximum. One mom I spoke with during my research shared that when she turned down her suction after developing a painful blister, she actually got more milk because she was more relaxed. That stuck with me.
If you feel pain, pinching, or see your nipple turning white or purple, turn the suction down immediately and reassess your flange fit.
Step 7: Pump for 15 Minutes (And Don’t Watch the Bottles!)
Set a timer for 15 minutes. Lactation experts and resources like KellyMom consistently recommend pumping for at least 15 minutes, even if milk stops flowing earlier. This continued stimulation tells your body to make more milk for next time.

Here’s my best tip: cover the bottles with a burp cloth or baby blanket. I know it’s tempting to watch every drop, but staring at the bottles creates stress and anxiety, which can actually inhibit milk flow. Your body needs oxytocin to release milk, and stress hormones like cortisol block oxytocin.
Instead, use this time to:
- Look at photos or videos of your baby
- Smell a piece of their clothing
- Close your eyes and imagine holding them close
- Listen to calming music or a favorite podcast
- Take slow, deep breaths
Step 8: Turn Off and Remove Gently
When the timer goes off, first turn the pump completely off. The suction will release. Then, to remove the flanges, gently slide a clean finger between your breast and the flange to break the seal. They’ll come away easily without any pulling.
Part 3: After Your Session—What to Do With Your “Liquid Gold”
Handle Your Milk
Look in the bottles. You might see just a few drops. You might see a teaspoon. You might see 10-15 mL. Or you might see 30 mL. Every single one of those amounts is a victory.
That colostrum or early milk—no matter how tiny the amount—is packed with antibodies, immune factors, and exactly what your baby needs. Carefully cap or seal the bottles, label them with today’s date and time, and place them directly in the refrigerator. Check our guide to storing breast milk safely to learn exactly how long it can be stored.
Rinse Your Parts
Take your pump parts to the sink and rinse them under cool water to remove any milk residue. This quick rinse prevents milk from drying and makes the full wash easier later. You can do a thorough wash with warm soapy water and air-dry them within the next hour or two.
What’s Normal? Let’s Talk Through Your Worries
I can almost hear the questions running through your mind. Let me address the most common ones:
“I barely got any milk! Did I do something wrong?”
No, my dear. You did everything right. During your first session, especially in the early postpartum days, getting very little is completely normal and expected. One study of 105 mothers found that in the first 24 hours postpartum, expressed colostrum ranged from just 0.1 to 11.2 mL total. Between 24-48 hours, it ranged from 2.2 to 40 mL.
If you’re pumping between breastfeeding sessions (not replacing a feed), getting anywhere from 0.5 to 3 ounces total per session is considered completely average and normal. The goal of this first session wasn’t to fill a bottle—it was to introduce your body to the pump and send the signal to make more milk. Those few drops? That’s your body responding. That’s success.
“It felt strange and a little uncomfortable.”
Of course it did! A breast pump is a completely new sensation, and it’s very different from how your baby nurses. Many moms describe the feeling as “weird” or “odd” at first. As long as it wasn’t painful, “a little strange” is perfectly normal. Your body will adjust to the sensation over the next few sessions.
If it was painful, that’s a sign that either your flange size isn’t right or your suction was too high. Make adjustments before your next session, and don’t hesitate to reach out to a lactation consultant if the pain continues.
“One breast produced more than the other.”
This is incredibly common! Most women have one breast—let’s call it the “overachiever”—that produces more milk than the other. It’s completely normal for your breasts to be uneven in their output. They’re a team, and together they’ll provide what your baby needs.
“I didn’t feel a let-down. Does that mean milk isn’t coming?”
Many moms never actually feel their let-down, especially when pumping. Just because you don’t feel that tingly sensation doesn’t mean milk isn’t flowing. The best way to know if you’ve had a let-down is to watch for milk beginning to spray or stream into the bottles rather than just drip.
Some women experience multiple let-downs during a single session (anywhere from 1 to 17!), while others have just one or two. Both patterns are normal and effective.
“How often should I be pumping?”
That depends entirely on your situation. If you’re exclusively pumping to build or maintain your milk supply, lactation experts recommend pumping 8-10 times per 24 hours in the early weeks, including at least once during the night (ideally between 1-6 AM when prolactin levels are highest).
If you’re primarily breastfeeding and pumping occasionally to build a stash, pumping once a day in the early morning (the time when most moms have the highest supply) is a great place to start. Many experts suggest waiting until breastfeeding is well established—around 3-4 weeks—before introducing regular pumping if it’s not medically necessary.
If you have specific concerns about your supply or your baby’s weight gain, please reach out to an IBCLC (International Board Certified Lactation Consultant) for personalized guidance.
You Are Doing an Incredible Job
Take one more deep, grounding breath. Look at what you just accomplished. You faced something completely new, you moved through uncertainty with courage, and you successfully completed your very first pumping session. That is huge.
This journey is not a sprint—it’s a marathon. And you just took the single most important step, which was simply beginning. Every pumping session from here will feel a little easier, a little more familiar, a little more natural.
Be gentle with yourself. Be patient with your body—it’s learning, just like you are. Give yourself the same grace and compassion you’d give a dear friend who was trying something new for the first time.
And remember: you don’t have to be perfect at this. You just have to keep showing up, one session at a time. The amount you pump will increase as your body learns what’s being asked of it. Your confidence will grow with practice. And most importantly, you’re providing nourishment and love for your baby in the way that works best for your family.
You are exactly the parent your baby needs. You’ve got this, mama.
Disclaimer: This article is for informational purposes only and does not constitute medical advice. The information shared here is based on my personal experience and extensive research from trusted sources including lactation consultants, pediatric organizations, and evidence-based resources. Every mother and baby is unique, and what works for one may not work for another. Please consult with a certified lactation consultant (IBCLC) or your healthcare provider for personalized advice regarding your specific situation, especially if you experience pain while pumping, concerns about your milk supply, or if your baby is losing weight or not gaining appropriately.